 MyBatis源码剖析-插件机制
# 1. 从一个普通的需求开始
如果现在有一个这样的需求:要对所有的接口方法做一个日志记录和接口耗时记录。
如何实现呢?最直接的方案当然是每个方法我都加上日志记录和接口耗时记录的代码,但是需要改动的方法肯定是茫茫多的,而且还是基本重复的。这时候想到了代理模式,静态代理模式肯定不行,这么多接口,得写多少个代理类啊,还是用JDK的动态代理吧!
我们假定需要代理的业务代码如下:
public interface Target {
    String execute(String name);
}

public class TargetImpl implements Target {
    @Override
    public String execute(String name) {
        System.out.println("执行业务代码:" + name);
        return name;
    }
}
2
3
4
5
6
7
8
9
10
11
# 1.1 需求实现1.0
我们创建一个代理类,使用JDK的动态代理生成代理对象:
public class TargetProxy implements InvocationHandler {

    private Object target;
    public TargetProxy(Object target) {
        this.target = target;
    }

    @Override
    public Object invoke(Object proxy, Method method, Object[] args) throws Throwable {
        System.out.println(" 日志记录...");
        Object result = method.invoke(target, args);
        System.out.println(" 日志记录...");
        return result;
    }

    public static<T> T wrap(T target) {
        return (T) Proxy.newProxyInstance(target.getClass().getClassLoader(),
                target.getClass().getInterfaces(),new TargetProxy(target));
    }
}
2
3
4
5
6
7
8
9
10
11
12
13
14
15
16
17
18
19
20
测试代码:
public class PluginTest extends TestCase {
    public void testPlugin(){
        Target target = new TargetImpl();
        //返回的是代理对象,实现了Target接口,
        //实际调用方法的时候,是调用TargetProxy的invoke()方法
        Target targetProxy = TargetProxy.wrap(target);
        targetProxy.execute(" HelloWord ");
    }
}
2
3
4
5
6
7
8
9
运行效果:
这思路是正确的了。但还是存在问题,execute() 是业务代码,我把所有的要拦截处理的逻辑都写到invoke方法里面了,不符合面向对象的思想,可以抽象一下处理。可以设计一个Interceptor接口,需要做什么拦截处理实现接口就行了。
# 1.2 需求实现2.0
定义Interceptor接口,并实现接口完成插件定义:
public interface Interceptor {
    /**
     * 具体拦截处理
     */
    void intercept();
}
// 日志记录插件
public class LogPlugin implements Interceptor {
    @Override
    public void intercept() {
        System.out.println("日志记录...");
    }
}
// 事务处理插件
public class TransactionPlugin implements Interceptor {
    @Override
    public void intercept() {
        System.out.println("开启事务....");
    }
}
2
3
4
5
6
7
8
9
10
11
12
13
14
15
16
17
18
19
20
代理对象也做一下修改:
public class TargetProxy implements InvocationHandler {

    private Object target;
    private List<Interceptor> interceptors;

    public TargetProxy(Object target, List<Interceptor> interceptors) {
        this.target = target;
        this.interceptors = interceptors;
    }

    @Override
    public Object invoke(Object proxy, Method method, Object[] args) throws Throwable {
        for (Interceptor interceptor : interceptors) {
            interceptor.intercept();
        }
        Object result = method.invoke(target, args);
        return result;
    }

    public static <T> T wrap(T target, List<Interceptor> interceptors) {
        return (T) Proxy.newProxyInstance(target.getClass().getClassLoader(),
                target.getClass().getInterfaces(), new TargetProxy(target, interceptors));
    }
}
2
3
4
5
6
7
8
9
10
11
12
13
14
15
16
17
18
19
20
21
22
23
24
测试代码:
public class PluginTest extends TestCase {
    public void testPlugin(){
        List<Interceptor> interceptorList = new ArrayList<>();
        interceptorList.add(new LogPlugin());
        interceptorList.add(new TransactionPlugin());

        Target target = new TargetImpl();
        //返回的是代理对象,实现了Target接口,
        //实际调用方法的时候,是调用TargetProxy的invoke()方法
        Target targetProxy = TargetProxy.wrap(target,interceptorList);
        targetProxy.execute(" HelloWord ");
    }
}
2
3
4
5
6
7
8
9
10
11
12
13
执行结果:
貌似有哪里不太对一样,按照上面这种我们只能做前置拦截,而且拦截器并不知道拦截对象的信息。应该做更一步的抽象,把拦截对象信息进行封装,作为拦截器拦截方法的参数,把拦截目标对象真正的执行方法放到Interceptor中完成,这样就可以实现前后拦截,并且还能对拦截对象的参数等做修改。
# 1.2 需求实现3.0
设计一个Invocation 对象:
public class Invocation {

    // 目标对象
    private Object target;
    // 执行的方法
    private Method method;
    // 方法的参数
    private Object[] args;

    public Invocation(Object target, Method method, Object[] args) {
        this.target = target;
        this.method = method;
        this.args = args;
    }

    // getter setter...

    /**
     * 执行目标对象的方法
     * @return
     * @throws Exception
     */
    public Object process() throws Exception{
        return method.invoke(target,args);
    }
}
2
3
4
5
6
7
8
9
10
11
12
13
14
15
16
17
18
19
20
21
22
23
24
25
26
拦截接口做修改:
public interface Interceptor {
    /**
     * 具体拦截处理
     */
    Object intercept(Invocation invocation) throws Exception;
}

public class LogPlugin implements Interceptor {
    @Override
    public Object intercept(Invocation invocation) throws Exception {
        System.out.println("日志记录...");
        Object result = invocation.process();
        System.out.println("日志记录...");
        return result;
    }
}

public class TransactionPlugin implements Interceptor {
    @Override
    public Object intercept(Invocation invocation) throws Exception {
        System.out.println("开启事务...");
        Object result = invocation.process();
        System.out.println("提交事务...");
        return result;
    }
}
2
3
4
5
6
7
8
9
10
11
12
13
14
15
16
17
18
19
20
21
22
23
24
25
26
这样就能实现前后拦截,并且拦截器能获取拦截对象信息,这样扩展性就好很多了。但是这样又引入了另外一个问题:
- 如果有多个插件需要调用,按照上面循环调用的方式目标方法也会执行多次,这显然是不合理的;
如何解决这个问题?
我们可以在代理对象上再嵌套代理,有多少个插件就嵌套多少层代理对象。为了实现这一目的,首先拦截器中需要提供返回代理对象的方法:
public interface Interceptor {
    /**
     * 具体拦截处理
     */
    Object intercept(Invocation invocation) throws Exception;
    /**
     *  插入目标类
     * @param target
     * @return
     */
    <T> T plugin(T target);
}

public class LogPlugin implements Interceptor {
    @Override
    public Object intercept(Invocation invocation) throws Exception {
        System.out.println("日志记录...");
        Object result = invocation.process();
        System.out.println("日志记录...");
        return result;
    }

    @Override
    public <T> T plugin(T target) {
        return TargetProxy.wrap(target,this);
    }
}

public class TransactionPlugin implements Interceptor {
    @Override
    public Object intercept(Invocation invocation) throws Exception {
        System.out.println("开启事务...");
        Object result = invocation.process();
        System.out.println("提交事务...");
        return result;
    }

    @Override
    public <T> T plugin(T target) {
        return TargetProxy.wrap(target,this);
    }
}
2
3
4
5
6
7
8
9
10
11
12
13
14
15
16
17
18
19
20
21
22
23
24
25
26
27
28
29
30
31
32
33
34
35
36
37
38
39
40
41
42
代理对象也做一下修改:
public class TargetProxy implements InvocationHandler {

    private Object target;
    private Interceptor interceptor;

    public TargetProxy(Object target, Interceptor interceptors) {
        this.target = target;
        this.interceptor = interceptors;
    }

    @Override
    public Object invoke(Object proxy, Method method, Object[] args) throws Throwable {
        Invocation invocation = new Invocation(target, method, args);
        return interceptor.intercept(invocation);
    }

    public static <T> T wrap(T target, Interceptor interceptor) {
        return (T) Proxy.newProxyInstance(target.getClass().getClassLoader(),
                target.getClass().getInterfaces(), new TargetProxy(target, interceptor));
    }
}
2
3
4
5
6
7
8
9
10
11
12
13
14
15
16
17
18
19
20
21
我们设计一个InterceptorChain 拦截器链类:
public class InterceptorChain {

    private List<Interceptor> interceptors = new ArrayList<>();

    public void addInterceptor(Interceptor interceptor){
        interceptors.add(interceptor);
    }

    public<T> T pluginAll(T target){
        for (Interceptor interceptor : interceptors) {
            target = interceptor.plugin(target);
        }
        return target;
    }

    public List<Interceptor> getInterceptorList(){
        return Collections.unmodifiableList(interceptors);
    }

}
2
3
4
5
6
7
8
9
10
11
12
13
14
15
16
17
18
19
20
测试代码:
public class PluginTest extends TestCase {
    public void testPlugin(){
        InterceptorChain interceptorChain = new InterceptorChain();
        interceptorChain.addInterceptor(new LogPlugin());
        interceptorChain.addInterceptor(new TransactionPlugin());

        Target target = new TargetImpl();
        Target proxyTarget = interceptorChain.pluginAll(target);
        proxyTarget.execute(" HelloWord ");
    }
}
2
3
4
5
6
7
8
9
10
11
运行结果: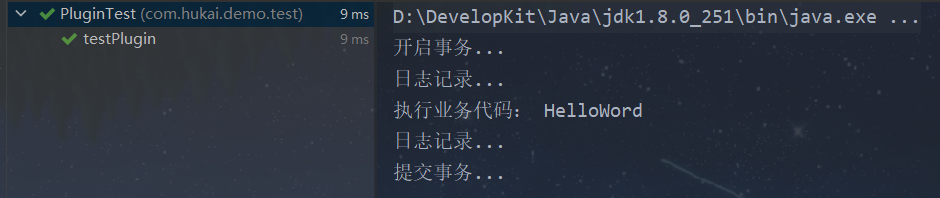
完美!后续如果再有其它插件需要引入只需要在拦截器链里加入这个插件就行。
# 2. MyBatis插件机制源码剖析
经过上面的分析,再去看mybastis plugin 源码的时候就很轻松了:
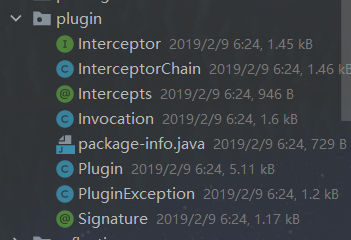
有没有觉得似曾相似的感觉呢,没错你的感觉是对的,这基本和我们上面的最终实现是一致的,Plugin相当于我们的TargetProxy。
接下来我们详细剖析MyBatis插件机制的源码,从以下两点出发:
- MyBatis 是如何加载插件配置的?
- MyBatis 是如何实现用户使用自定义插件对 SQL 语句执行过程中的某一点进行拦截的?
# 2.1 加载插件配置
在 MyBatis 初始化时,会通过 XMLConfigBuilder.pluginElement方法解析核心配置文件中定义的节点,得到相应的 Interceptor 对象,最后将 Interceptor 对象添加到Configuration.interceptorChain字段中保存。源码如下所示:
/**
 * 解析 <plugins /> 标签,添加到 {@link Configuration#interceptorChain} 中
 *
 * @param parent 节点
 * @throws Exception 发生异常时
 */
private void pluginElement(XNode parent) throws Exception {
    if (parent != null) {
        // 遍历 <plugins /> 标签
        for (XNode child : parent.getChildren()) {
            String interceptor = child.getStringAttribute("interceptor");
            Properties properties = child.getChildrenAsProperties();
            // 创建 Interceptor 对象,并设置属性
            Interceptor interceptorInstance = (Interceptor) resolveClass(interceptor).newInstance();
            interceptorInstance.setProperties(properties);
            // 添加到 configuration 中
            configuration.addInterceptor(interceptorInstance);
        }
    }
}

public void addInterceptor(Interceptor interceptor) {
    interceptorChain.addInterceptor(interceptor);
}
2
3
4
5
6
7
8
9
10
11
12
13
14
15
16
17
18
19
20
21
22
23
24
# 2.2 拦截过程
继续介绍 MyBatis 的拦截器如何对 Exector、StatementHandler、ParameterHandler、ResultSetHandler 进行拦截。
在 MyBatis 中使用的这四类对象,都是通过 Configuration 创建的,方法如下图所示。如果配置了自定义拦截器,则会在该系列方法中,通过 InterceptorChain.pluginAll() 方法为目标对象创建代理对象,所以通过 Configuration.new*() 系列方法得到的对象实际是一个代理对象。

以 newExecutor() 方法为例进行分析,其他方法原理类似,newExecutor() 方法的具体实现如下所示:
protected ExecutorType defaultExecutorType = ExecutorType.SIMPLE;

public Executor newExecutor(Transaction transaction) {
    return newExecutor(transaction, defaultExecutorType);
}

/**
 * 创建 Executor 对象
 *
 * @param transaction 事务对象
 * @param executorType 执行器类型
 * @return Executor 对象
 */
public Executor newExecutor(Transaction transaction, ExecutorType executorType) {
    // 获得执行器类型
    executorType = executorType == null ? defaultExecutorType : executorType; // 使用默认
    executorType = executorType == null ? ExecutorType.SIMPLE : executorType; // 使用 ExecutorType.SIMPLE
    // 创建对应实现的 Executor 对象
    Executor executor;
    if (ExecutorType.BATCH == executorType) {
        executor = new BatchExecutor(this, transaction);
    } else if (ExecutorType.REUSE == executorType) {
        executor = new ReuseExecutor(this, transaction);
    } else {
        executor = new SimpleExecutor(this, transaction);
    }
    // 如果开启缓存,创建 CachingExecutor 对象,进行包装
    if (cacheEnabled) {
        executor = new CachingExecutor(executor);
    }
    // 应用插件
    executor = (Executor) interceptorChain.pluginAll(executor);
    return executor;
}
2
3
4
5
6
7
8
9
10
11
12
13
14
15
16
17
18
19
20
21
22
23
24
25
26
27
28
29
30
31
32
33
34
在 InterceptorChain.pluginAll() 方法会遍历 interceptors 集合,并调用每个 interceptor 的 plugin() 方法创建代理对象,这个就和我们上面实现的是一样的:
/**
 * 拦截器链
 *
 * @author Clinton Begin
 */
public class InterceptorChain {

    /**
     * 拦截器数组
     */
    private final List<Interceptor> interceptors = new ArrayList<>();

    /**
     * 应用所有插件
     *
     * @param target 目标对象
     * @return 应用结果
     */
    public Object pluginAll(Object target) {
        for (Interceptor interceptor : interceptors) {
            target = interceptor.plugin(target);
        }
        return target;
    }

    public void addInterceptor(Interceptor interceptor) {
        interceptors.add(interceptor);
    }

    public List<Interceptor> getInterceptors() {
        return Collections.unmodifiableList(interceptors);
    }

}
2
3
4
5
6
7
8
9
10
11
12
13
14
15
16
17
18
19
20
21
22
23
24
25
26
27
28
29
30
31
32
33
34
一般我们自定义拦截器的 plugin 方法,会使用 MyBatis 提供的 Plugin 工具类,它实现了 InvocationHandler 接口,并提供了 wrap() 静态方法用于创建代理对象,这个类的作用和我们上面的TargetProxy类是一样的。
package org.apache.ibatis.plugin;

import org.apache.ibatis.reflection.ExceptionUtil;

import java.lang.reflect.InvocationHandler;
import java.lang.reflect.Method;
import java.lang.reflect.Proxy;
import java.util.HashMap;
import java.util.HashSet;
import java.util.Map;
import java.util.Set;

/**
 * 插件类,一方面提供创建动态代理对象的方法,另一方面实现对指定类的指定方法的拦截处理。
 *
 * @author Clinton Begin
 */
public class Plugin implements InvocationHandler {

    /**
     * 目标对象
     */
    private final Object target;
    /**
     * 拦截器
     */
    private final Interceptor interceptor;
    /**
     * 拦截的方法映射
     *
     * KEY:类
     * VALUE:方法集合
     */
    private final Map<Class<?>, Set<Method>> signatureMap;

    private Plugin(Object target, Interceptor interceptor, Map<Class<?>, Set<Method>> signatureMap) {
        this.target = target;
        this.interceptor = interceptor;
        this.signatureMap = signatureMap;
    }

    /**
     * 创建目标类的代理对象
     *
     * @param target 目标类
     * @param interceptor 拦截器对象
     * @return 代理对象
     */
    public static Object wrap(Object target, Interceptor interceptor) {
        // 获得拦截的方法映射
        Map<Class<?>, Set<Method>> signatureMap = getSignatureMap(interceptor);
        // 获得目标类的类型
        Class<?> type = target.getClass();
        // 获得目标类的接口集合
        Class<?>[] interfaces = getAllInterfaces(type, signatureMap);
        // 若有接口,则创建目标对象的 JDK Proxy 对象
        if (interfaces.length > 0) {
            return Proxy.newProxyInstance(
                    type.getClassLoader(),
                    interfaces,
                    new Plugin(target, interceptor, signatureMap)); // 因为 Plugin 实现了 InvocationHandler 接口,所以可以作为 JDK 动态代理的调用处理器
        }
        // 如果没有,则返回原始的目标对象
        return target;
    }

    @Override
    public Object invoke(Object proxy, Method method, Object[] args) throws Throwable {
        try {
            // 获得目标方法是否被拦截
            Set<Method> methods = signatureMap.get(method.getDeclaringClass());
            if (methods != null && methods.contains(method)) {
                // 如果是,则拦截处理该方法
                return interceptor.intercept(new Invocation(target, method, args));
            }
            // 如果不是,则调用原方法
            return method.invoke(target, args);
        } catch (Exception e) {
            throw ExceptionUtil.unwrapThrowable(e);
        }
    }

    private static Map<Class<?>, Set<Method>> getSignatureMap(Interceptor interceptor) {
        Intercepts interceptsAnnotation = interceptor.getClass().getAnnotation(Intercepts.class);
        // issue #251
        if (interceptsAnnotation == null) {
            throw new PluginException("No @Intercepts annotation was found in interceptor " + interceptor.getClass().getName());
        }
        Signature[] sigs = interceptsAnnotation.value();
        Map<Class<?>, Set<Method>> signatureMap = new HashMap<>();
        for (Signature sig : sigs) {
            Set<Method> methods = signatureMap.computeIfAbsent(sig.type(), k -> new HashSet<>());
            try {
                Method method = sig.type().getMethod(sig.method(), sig.args());
                methods.add(method);
            } catch (NoSuchMethodException e) {
                throw new PluginException("Could not find method on " + sig.type() + " named " + sig.method() + ". Cause: " + e, e);
            }
        }
        return signatureMap;
    }

    private static Class<?>[] getAllInterfaces(Class<?> type, Map<Class<?>, Set<Method>> signatureMap) {
        // 接口的集合
        Set<Class<?>> interfaces = new HashSet<>();
        // 循环递归 type 类,机器父类
        while (type != null) {
            // 遍历接口集合,若在 signatureMap 中,则添加到 interfaces 中
            for (Class<?> c : type.getInterfaces()) {
                if (signatureMap.containsKey(c)) {
                    interfaces.add(c);
                }
            }
            // 获得父类
            type = type.getSuperclass();
        }
        // 创建接口的数组
        return interfaces.toArray(new Class<?>[interfaces.size()]);
    }

}
2
3
4
5
6
7
8
9
10
11
12
13
14
15
16
17
18
19
20
21
22
23
24
25
26
27
28
29
30
31
32
33
34
35
36
37
38
39
40
41
42
43
44
45
46
47
48
49
50
51
52
53
54
55
56
57
58
59
60
61
62
63
64
65
66
67
68
69
70
71
72
73
74
75
76
77
78
79
80
81
82
83
84
85
86
87
88
89
90
91
92
93
94
95
96
97
98
99
100
101
102
103
104
105
106
107
108
109
110
111
112
113
114
115
116
117
118
119
120
121
# 3. 总结
Mybatis 拦截器的使用是实现Interceptor接口:
/**
 * 拦截器接口
 *
 * @author Clinton Begin
 */
public interface Interceptor {

    /**
     * 拦截方法
     *
     * @param invocation 调用信息
     * @return 调用结果
     * @throws Throwable 若发生异常
     */
    Object intercept(Invocation invocation) throws Throwable;

    /**
     * 应用插件。如应用成功,则会创建目标对象的代理对象
     *
     * @param target 目标对象
     * @return 应用的结果对象,可以是代理对象,也可以是 target 对象,也可以是任意对象。具体的,看代码实现
     */
    Object plugin(Object target);

    /**
     * 设置拦截器属性
     *
     * @param properties 属性
     */
    void setProperties(Properties properties);

}
2
3
4
5
6
7
8
9
10
11
12
13
14
15
16
17
18
19
20
21
22
23
24
25
26
27
28
29
30
31
32
通过上面的分析可以知道,所有可能被拦截的处理类都会生成一个代理类,如果有n个拦截器,就会有n个代理,层层生成动态代理是比较耗性能的。而且虽然能指定插件拦截的位置,但这个是在执行方法时利用反射动态判断的,初始化的时候就是简单的把拦截器插入到了所有可以拦截的地方。所以尽量不要编写不必要的拦截器。